Game summary:
A game for 1-5 players (also solo play available)
Play time around 60 – 75 Min
Designer: Daryl Chow, Daniel Rocchi
Artist: Josh Cappel, Dominik Mayer
Publisher: Grand Gamers Guild
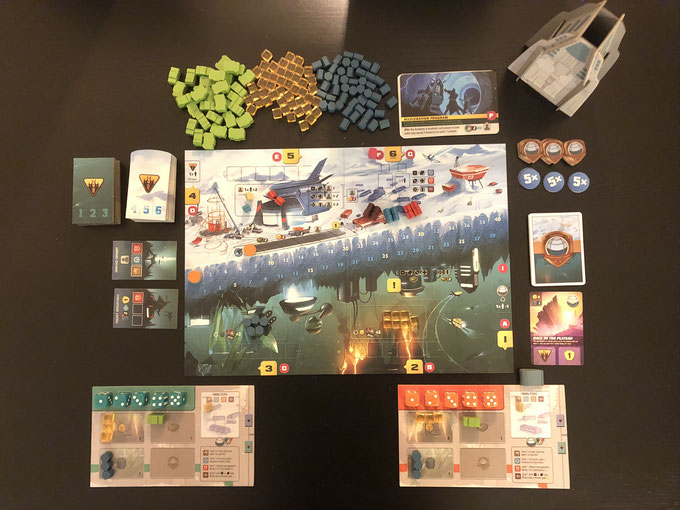
Unboxing
This box, got the following components in it:
1 rulebook
1 game board
5 player mats
52 building tiles
22 expedition cards
14 event cards
84 5 Colonist markers (28 Pioneers, 24 Engineers, 16 Marines, and 16 Stewards)
35 Expedition badges
35 Toolkit markers
60 Mineral tokens
60 Energy tokens
25 player dice
20 5x markers
10 player markers
1 phase marker
1 event marker
1 ShakeShip
1 Draw bag


Let’s get it on the table
Set up the game board
Place the board central so every player can reach it. Then place the minerals, energy, toolkits, badges and the 5x tokens near the board.
Place 4 Engineers, 4 Marines and 4 stewards on the board, near the academy (region 6). Give already each player 1 pioneer and place the rest of the colonists into the ShakeShip (or the bag, if you don’t like the ship).
Shuffle the building tiles, event cards and expedition cards. Place the building tiles near region 4 and make 2 stacks one for the Surface and the other for the Ocean tiles. Draw 6 event cards and place them faced down on top of the board. Then place the Expedition cards near region 1, make sure you have some extra space for the discard pile.
Set up the player board
Give each player a player mat and the matching dice.
Each player takes 3 minerals, 3 energy and 1 toolkit from the supply and place them on their mat.
Place your pioneer in the shelter (right top of your mat). And finally place your player markers on the board, you place one marker on the Score track and the other marker on the Relief track.
Before you start playing, you’ll always start with a board setup also in the next rounds! So that you can get the board ready for the next round. Because it’s the first round, you don’t have to discard any cards.
1. Basecamp; Discard all the cards into the discard pile and draw new cards from the deck, but 1 fewer then the number of players (in a 2 player game, you’ll draw 1 card).
2. Vents; Discard any tokens and place new energy. Take a look at the top left Expedition cards that are drawn in the basecamp, in the top you’ll see the numbers of energy combined (with the other cards) that you place on the board + 2 energy.
3. Quarry; Discard any tokens and place new minerals. Take a look at the top left Expedition cards that are drawn in the basecamp, in the top you’ll see the numbers of minerals combined (with the other cards) that you place on the board + 2 minerals.
4. Gantry; reveal building from the tiles Ocean or Surface, it depends in which round you are, equal to the number of players. If there are more then 8 buildings then you have to stop, it’s not allowed to reveal more than 8!
5. Doorstep; place random colonists from the ShakeShip into the Doorstep, two more then the number of players (2 player game, you’ll place 4 colonists).
6. Academy and ! no extra setup necessary.
After this is done, you’re ready to play!
You play a total of 6 rounds (those 6 event cards), each rounds contains the following 3 phases:
Placement phase; in this phase each player get to choose where to place their dice, after you rolled your dice.
Resolution phase; in this phase you’ll resolve each region starting from the Basecamp (region 1) in clockwise order. In this phase you’ll also resolve the Event card when the Event Marker has reached the Phase Marker (the red marker).
Upkeep phase; in this phase you can move/swap 1 colonist, activate buildings, pay energy and refresh the game board for the next round. To refresh the board, look at the setup actions as I described earlier.

Let’s get it to the table for a Solo Game
For a solo game you’ll play against 2 drones! The setup of the board is the same as against other players but in this case the 2 drones don’t receive 5 dice but 4! So you are the only player with a player board and 5 dice, this setup is also the same.
For the drones, you choose 4 dices and 2 different colors. Then you also choose a single dice (another color) to act as an agenda.
Remember during the game, when one of the drones has to pay minerals always pretend that the drone can pay them. When a drone receives colonists, minerals or energy it will be placed back into the supply. A received building will be discarded. Remember, there’s only 1 space available at the Academy (Region 6).
For example;
you got the 5 green dice,
drone 1 has 4 purple dice
drone 2 has 4 blue dice
and yellow for the Agenda die.
Gameplay
Each round you’ll play Drone 1, you, Drone 2 and this for all the 6 rounds. The Drones will never be affected by Events, so this only counts for you!
Start with rolling the Agenda die for Drone 1, this tells you where to start with placing the dice for Drone 1. After the Agenda die has been rolled, it’s time to roll the dice for Drone 1 and place them clockwise and ascending value (low to high) and start at the number you’ve rolled with the Agenda die! The Drones will never visit Region ! (the Outfitter).
After all the dice have been placed, it’s your turn to roll and place your dice where ever you want.
At least you’ll roll again the Agenda die for Drone 2 and then roll the 4 dice for Drone 2 and place them counterclockwise in ascending value (low to high).
Special rules for placing a die from Drone 1 or 2 in the Gantry (Region 4);
Drone 1; will be placed on an empty building closest to the stack;
Drone 2; will be placed on an empty building closest to the stack, but
– if there isn’t an empty building it outbids an existing lower-valued die preferring to overbid your die over a Drone die if that’s possible;
– if the Drone die could outbid more than one of your dice then you get to choose which one gets outbid;
– if the Drone can’t outbid the highest bid on any buildings, that die will skip his turn this round and you can place it aside.
End of the game
The game ends after 6 rounds, then every player start counting all of the points in specific order!. The same counting when playing solo and the game ends:
1. Saved Energy and Minerals; For every 5 Energy or 5 Minerals you’ve left, you earn 1 VP (max 3VP for Energy and 3VP for Minerals).
2. Fully Staffed Surface Buildings; You score the VPNN as described on the building tile. What if they’re not fully staffed? Then no VP to earn.
3. Number of Buildings; Earn VPN based on the number of buildings you’ve constructed, whether they’re fully staffed or not:
0 to 2 – 0 points
3 – 1 point
4 – 2 points
5 – 3 points
6 – 5 points
7+ – 8 points
4. Colonist sets; Earn 3VP of each full set of 4 different colonists, you can move them from your buildings. You don’t need them anymore in your buildings!
5. Leftover Colonists; For every 3 sets of colonists that weren’t a part of a set (see 4.) you score 1VP.
6. Expedition badges; Earn or lose VP based on the number of Expedition badges you’ve collected:
0 to 1 – -3 points
2 to 4 – 0 points
5 to 7 – 3 points
8+ – 5 points
7. Most Toolkits; Earn 2VP if you have the most, or when it’s a tied, for the most Toolkits.
When playing solo you can see what your rank is after counting all of you points;
20 or less Tentacle Cleanup Crew
21 to 24 Mediocronaut
21 to 28 Macro Manager
29 to 32 Colonial Commandant
33 or more Artemis Prime
Final Conclusion & rating:
Weight: 2.85/ 5
My rating: 🎲🎲🎲🎲🎲🎲🎲🎲🎲
I was really surprised by this game when I unboxed it. It really surprised me with everything in this box. All the components are really from great quality and also looks great. The board itself isn’t that big but it’s a great designed gameboard with some awesome graphics. The 3 different phases, they are easy explained and easy to follow them but there’s also a lot of interaction with other players when the dice. I like games where there’s interaction with other players. But sometimes you also have to “work” together to get an Expedition card and sometimes you think that you can receive Minerals or Energy but then another player place his lower die. The playtime is really not long for a game like this, “just” 6 rounds to play but also in these rounds 6 different cards that change the game a bit or change the way you have to play for example that you lose Minerals. The Resolution phase is also a easy phase because you just start at Region 1 and then you go clockwise to Region 6 and ! .
I also played this game solo and I must say that I really loved it! It’s pretty cool that you play against 2 opponents named Drone 1 and Drone 2. It’s almost as playing against several other players because you don’t know what the actions are and where Drone 1 and Drone 2 will place their dice. Sometimes I thought this building or these Energy are mine and then Drone 2 changed this and that’s also a struggle to get more points at the end of the game.
My final conclusion is that I really recommend The Artemis Project for solo play and with other players! You’ll definitely have a lot fun during your game night when you play this game. Are you going to survive Europe, Jupiter’s moon?
What I really like?
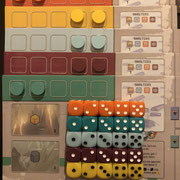
– The quality of the components are great, tiny meeples, great board and other components;
– It’s a very clear game with lot of interaction with other players;
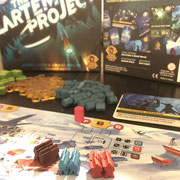
– The ShakeShip, really cool that they’ve added this to the game. You can use this instead of the black bag;
– You can play this game SOLO 🙂 and this is one of the best solo games I’ve played!
What could be better?
– The size of some of the components are a bit bigger than others, it feels a bit awkward when you get them ready for play;
– I missed a small reference card with all the phases so you can easily look back, it isn’t a big thing but I really like it when these cards are added to a game;
– The inlay, I really like everything in this box but I really found it hard to get everything back in the box. Especially when you’ve build the ShakeShip!
Many thanks to Marc Specter from Grand Gamers Guild for giving me to opportunity to review this awesome game!